Setup Version Control
Introduction
Fluxscape uses Git as its underlying version control system. Version control allows you to:
- Collaborate with team members
- Work with multiple versions of a project in parallel (branches)
- Keep a full history of your project, locally or via a connected Git repository (e.g. GitHub)
Initializing version control always starts with local Git.
Connecting a remote repository is optional and done separately.
Requirements
Before setting up version control, make sure:
- Git is installed on your machine
Fluxscape relies on your local Git installation.- macOS: Git is usually preinstalled
- Windows: Install from https://git-scm.com
- Your project is stored in a local folder
- (Optional) A GitHub account if you want to collaborate or push to a remote repository
Initialize Version Control (Local Git)
This is the first step and enables Git locally only.
- Open your project in Fluxscape
- Open the Version Control panel
- Click Initialize Version Control (Git)
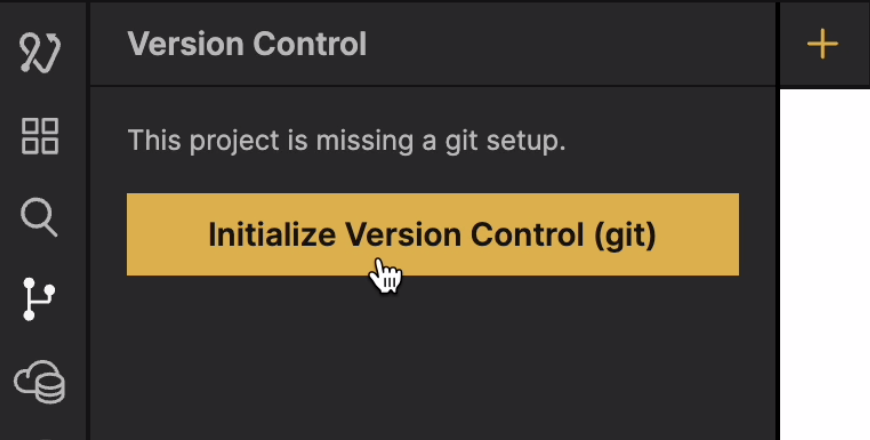
This will:
- Initialize Git in your project folder
- Enable local commits and history
- Not connect to GitHub or any remote service
All changes and history remain on your machine until a remote repository is added.
This setup is ideal for:
- Solo work
- Prototyping
- Working offline
- Getting started with version control
Connect a GitHub Repository (Optional)
Connecting a GitHub repository allows you to collaborate with others and back up your project remotely.
Before connecting a repository in Fluxscape, make sure you either:
- Created a GitHub repository, or
- Were granted full access to an existing repository
Fluxscape always works with a local project folder. If you are connecting to an existing repository, it must be cloned to your machine first.
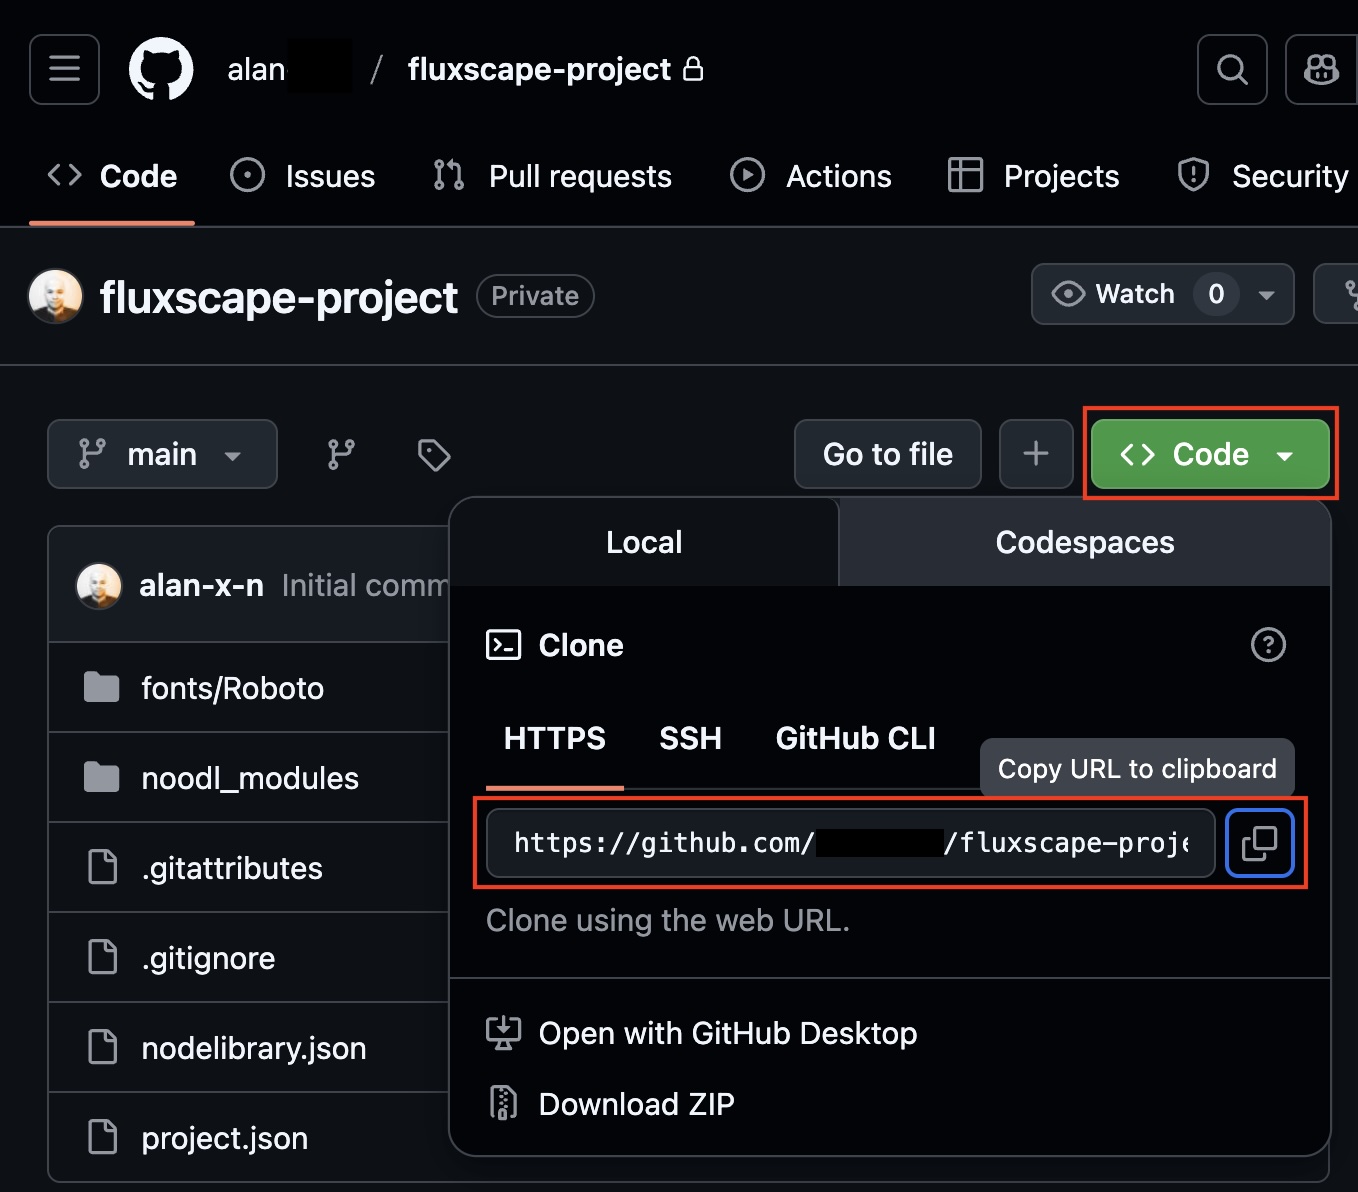
Step 1: Choose or create a GitHub repository
You can connect:
- An existing GitHub repository (for example, one shared with you by a collaborator), or
- A newly created empty repository
Fluxscape always works with a local project folder. If you are connecting to an existing project and repository, first clone the repository to your machine, import the project into Fluxscape, and then Open the Project.
Step 2: Set up GitHub authentication
GitHub requires authentication when pushing or pulling changes.
Fluxscape uses GitHub Personal Access Tokens.
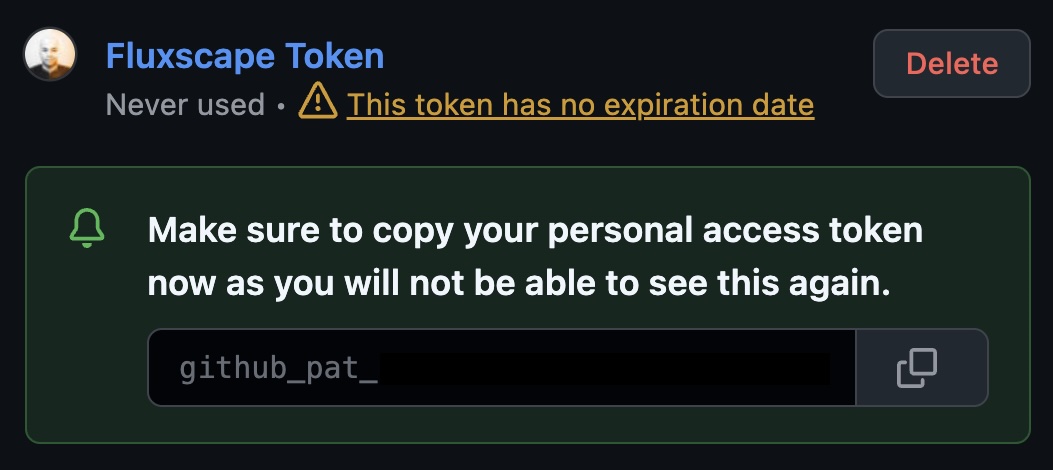
Create a Personal Access Token
- Visit https://github.com/settings/personal-access-tokens (Or go to Github Settings > Developer Settings > Personal Access Tokens)
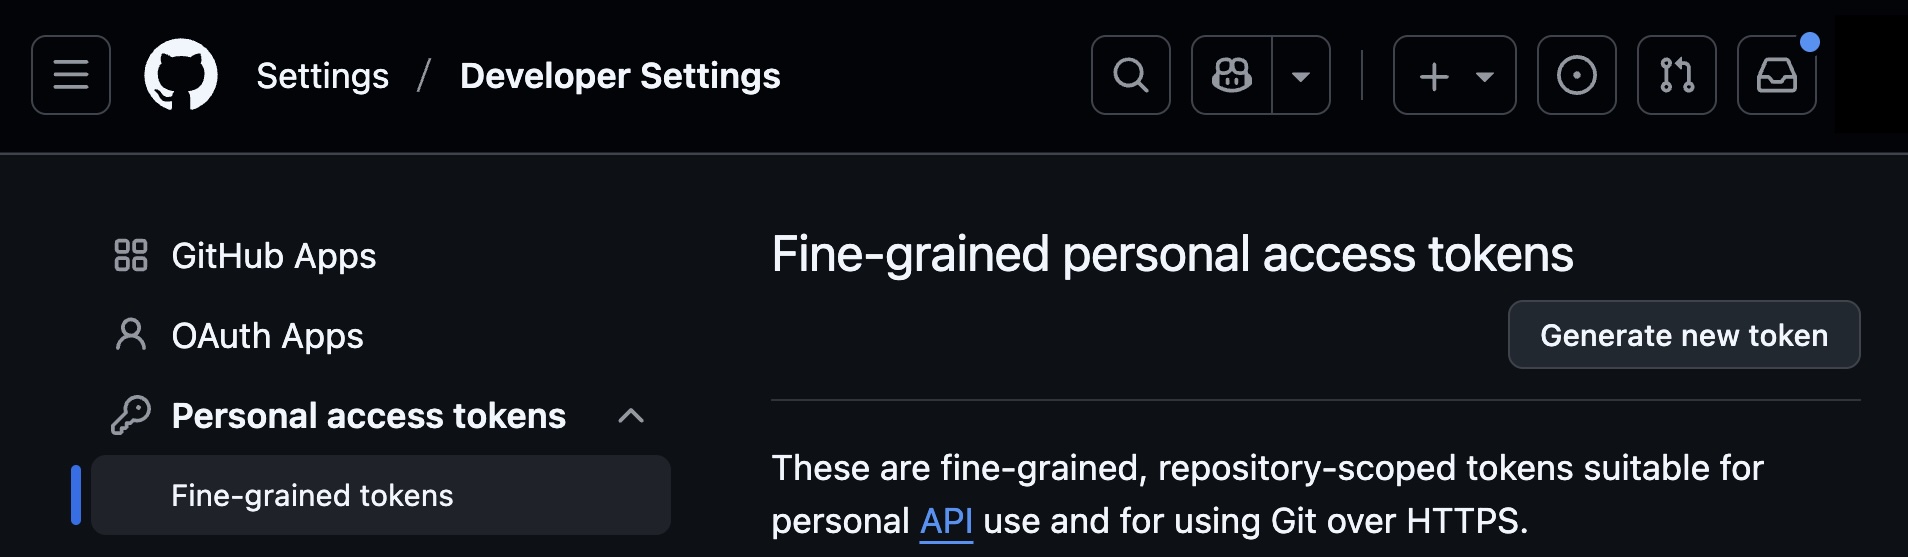
- Create a fine-grained personal access token
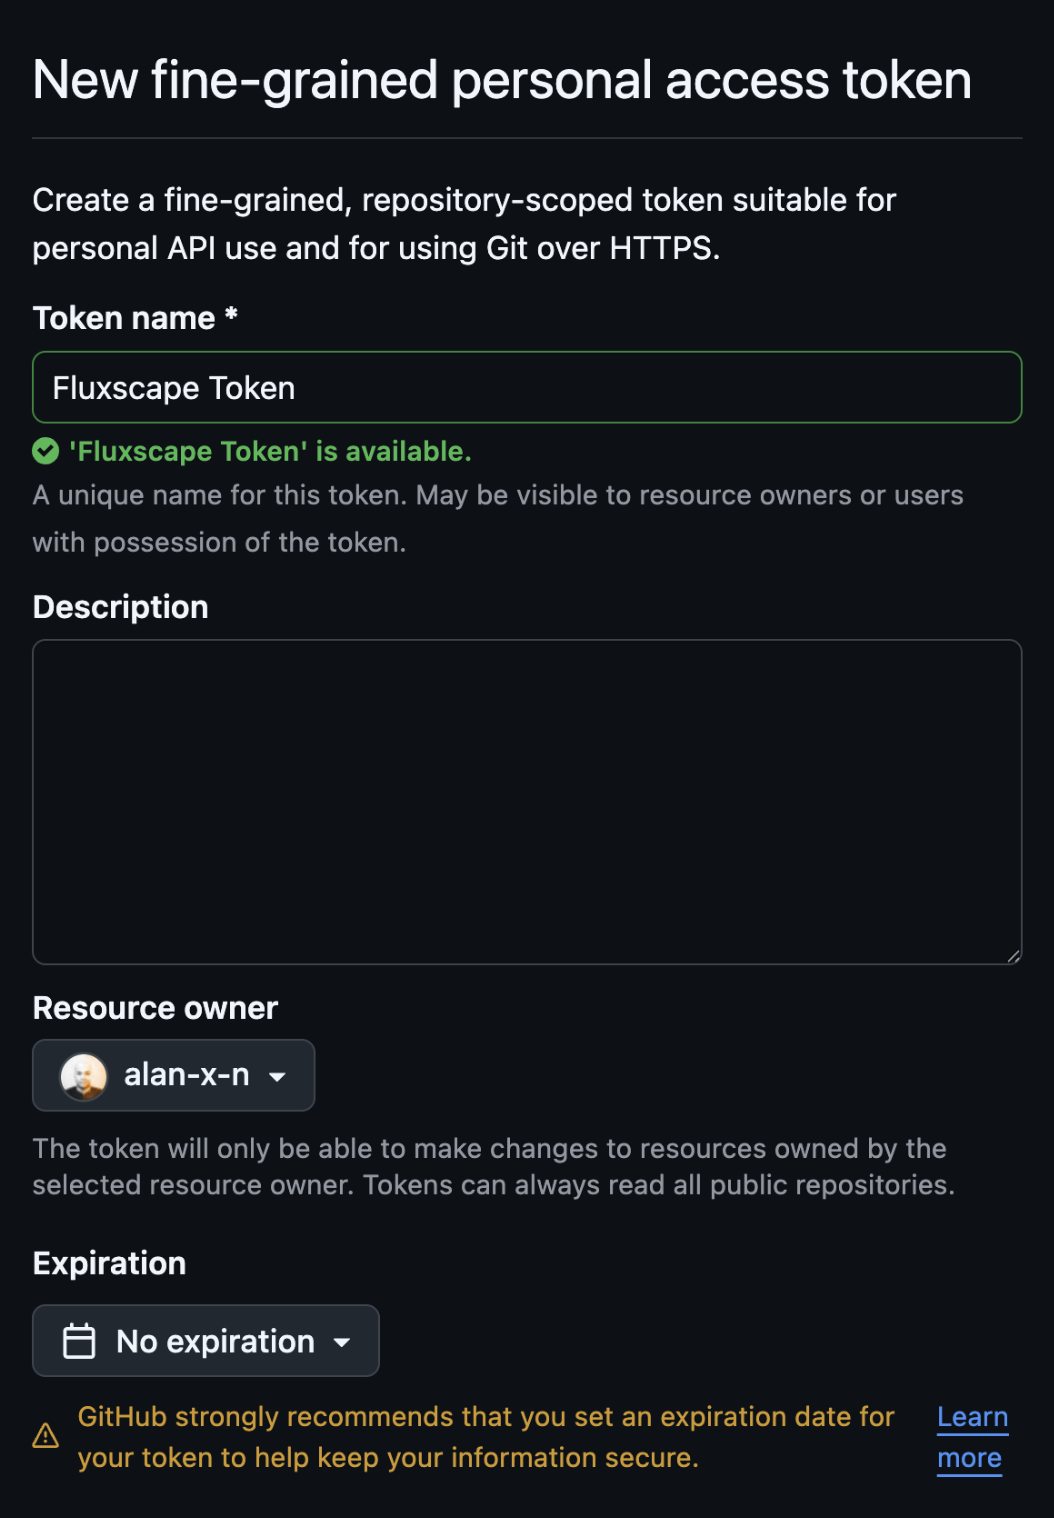
- Set your Expiration
- Select the repository you want to connect
- Grant Read & write access to repository "Contents"
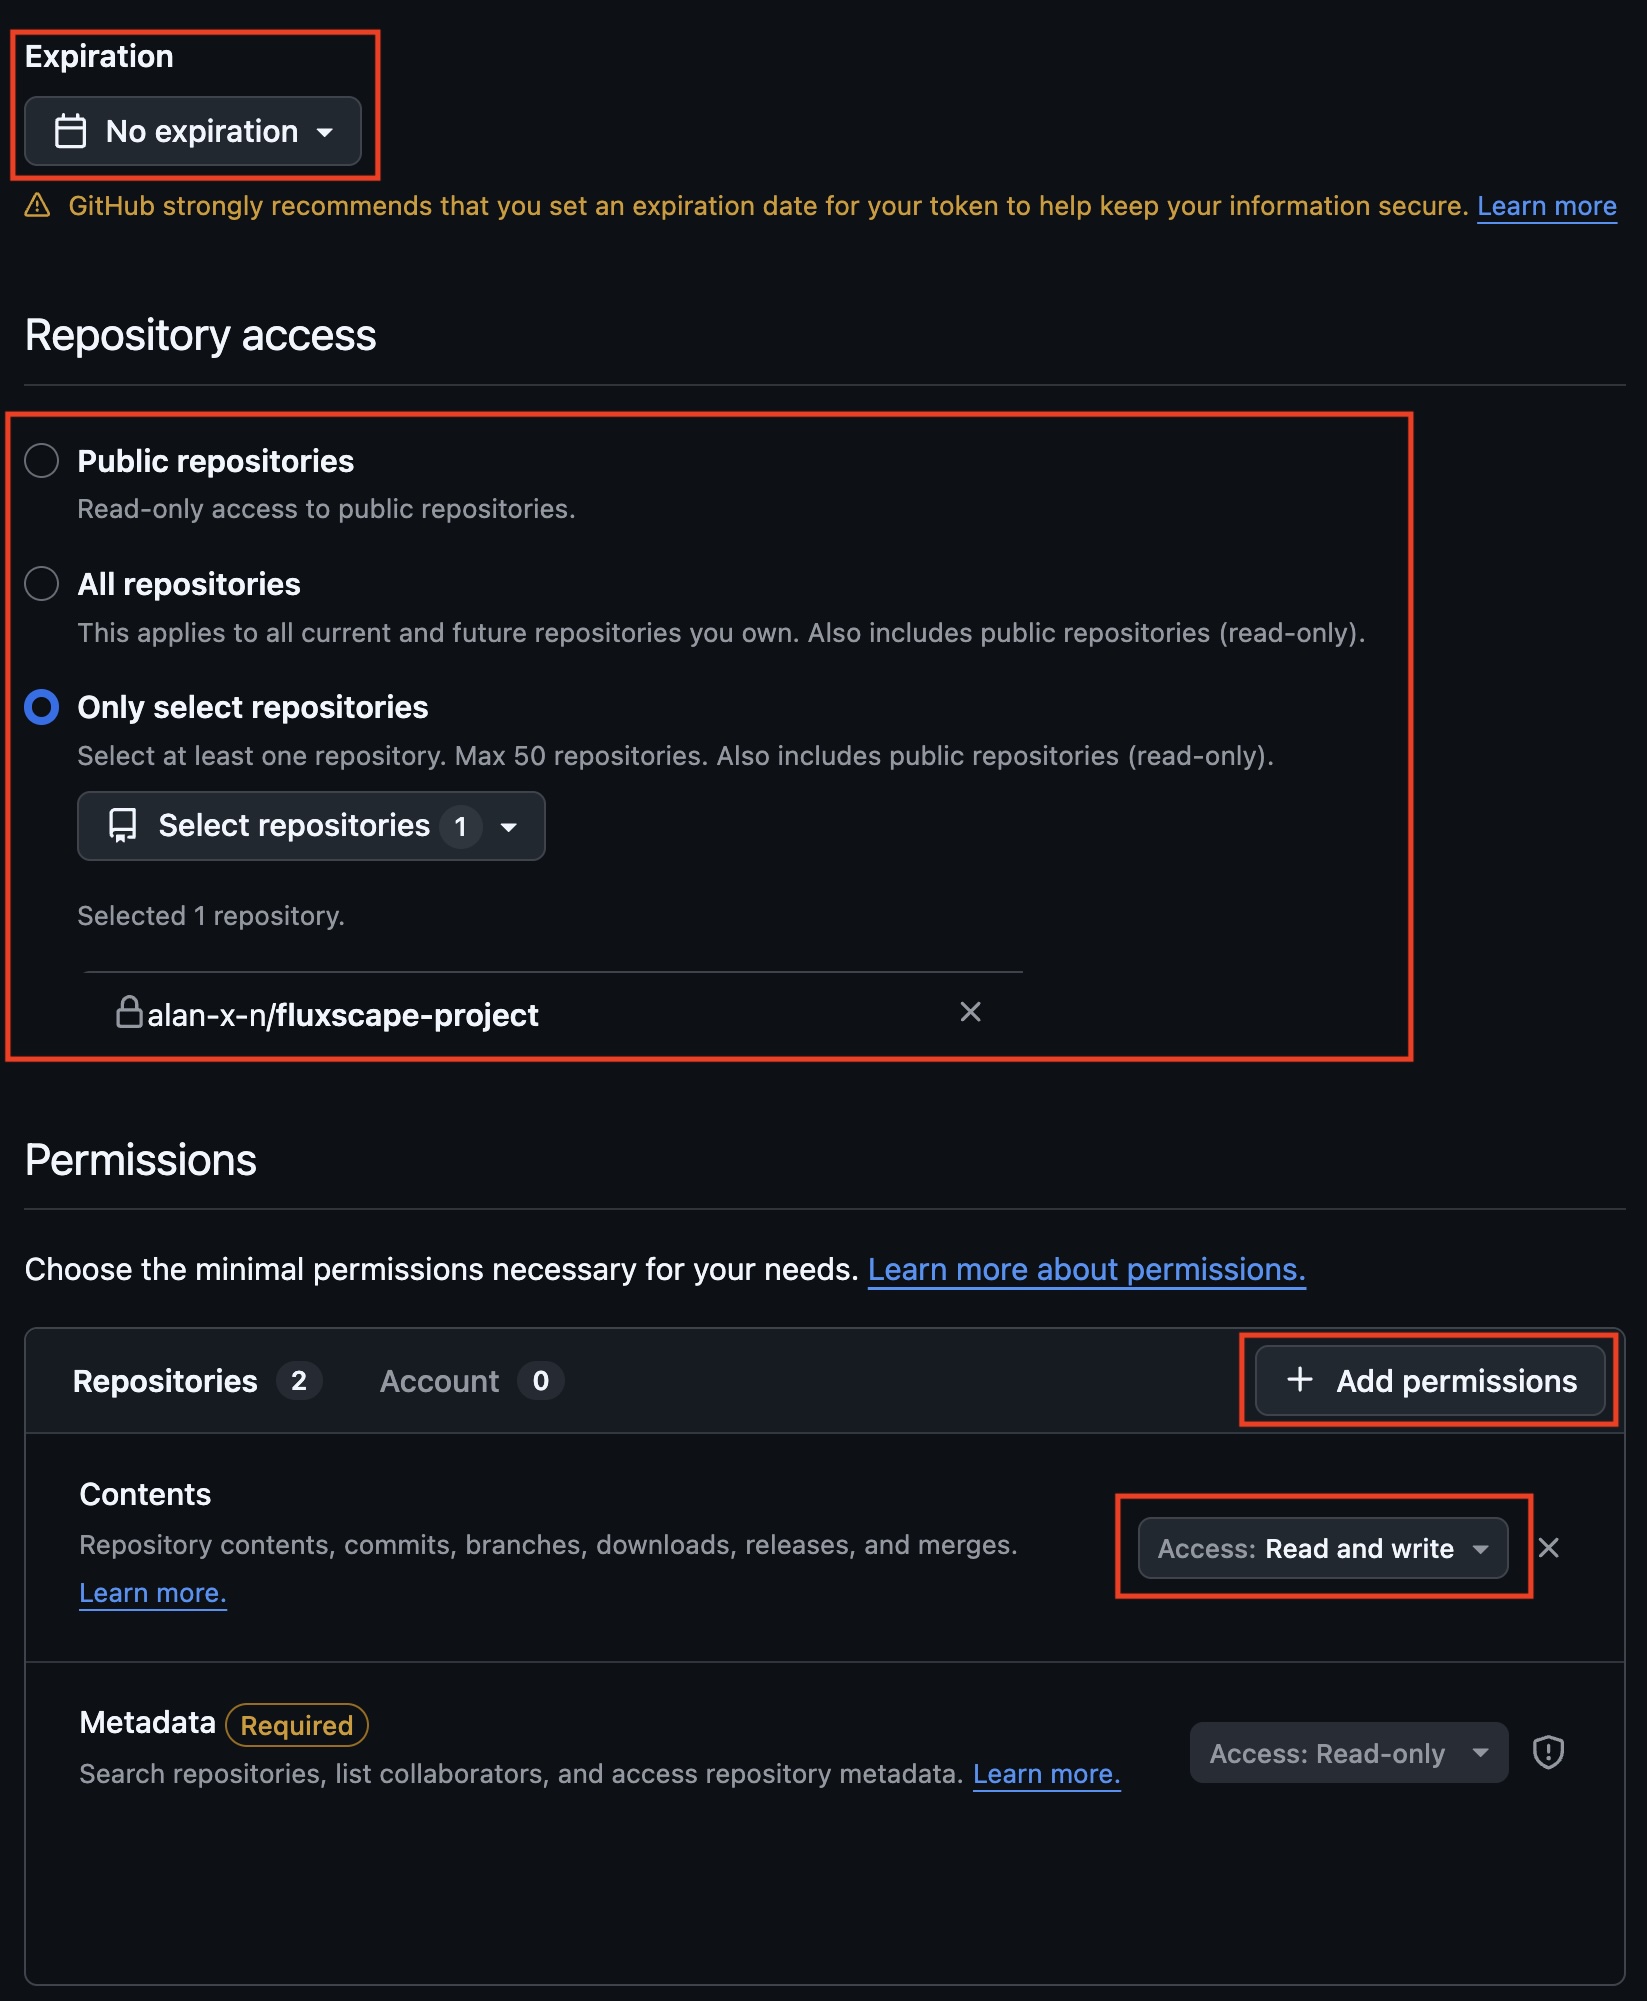
- Create the Token & Copy the token (it cannot be viewed again)
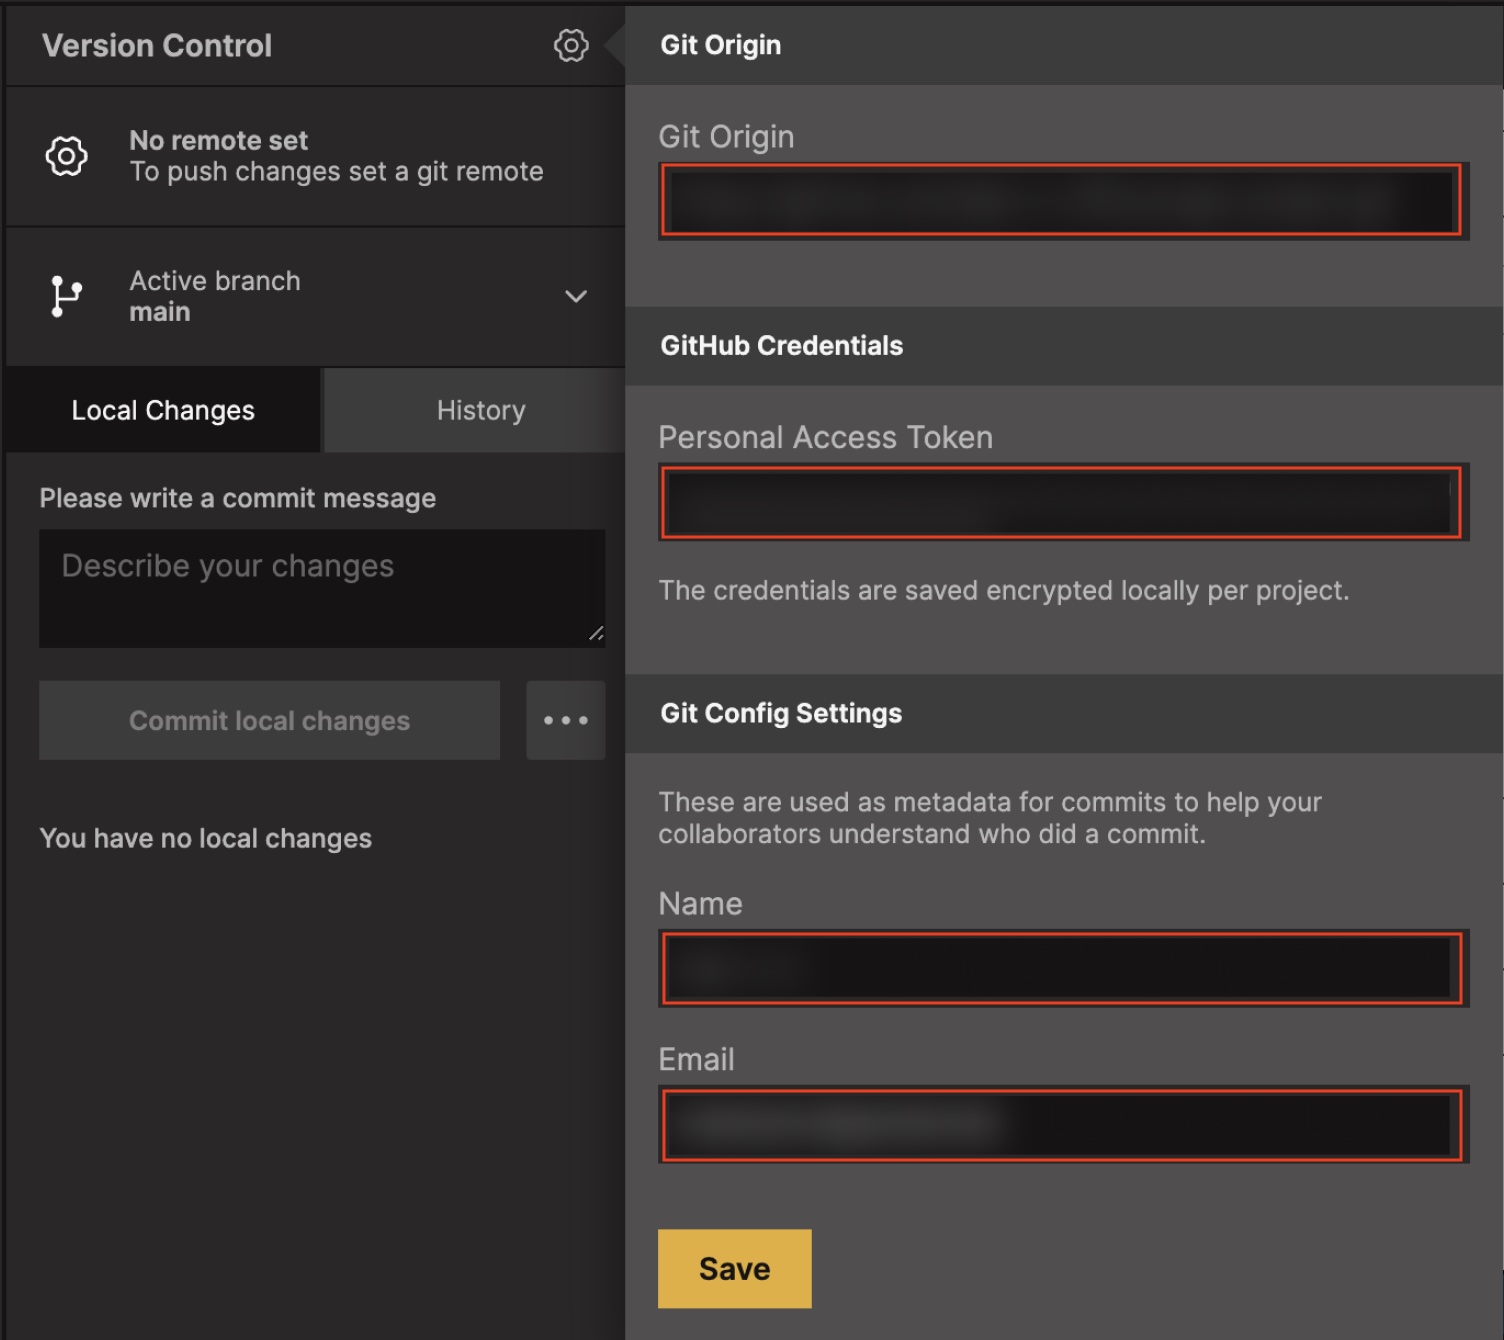
Step 3: Configure the Git remote in Fluxscape
- Open your project in Fluxscape
- Open the Version Control panel
- Click Version Control Settings (Gear Icon)
- Find your GitHub Repo Origin URL
- Paste the GitHub Repo Origin URL
- Paste your Personal Access Token into GitHub Credentials
- Save
Next Steps
Continue to Using Version Control to learn how to work with commits, syncing, conflicts, and branches.